Allow your premium tenants to use their own custom domain to access their CRM. A high-value feature for your top-tier plans.
Custom domains let your tenants access their CRM using their own domain name instead of a subdomain. For example, instead of acme.yourplatform.com, Acme Corp could use crm.acmecorp.com. This is a premium feature that adds significant perceived value.
How It Works
You enable Custom Domains for a subscription plan
A tenant on that plan enters their custom domain in their dashboard
The tenant points their domain's DNS to your server
The module automatically detects and routes traffic to the correct tenant
Enabling Custom Domains for a Plan
Go to SaaS Management → Plans
Edit the plan where you want to enable custom domains
Scroll down to "Advanced Feature"
Toggle "Enable Custom Domain" to ON
Click Save
Toggle "Enable Custom Domain" in the Advanced Feature section — typically for your premium plans only
Business Strategy: Only enable Custom Domains on your higher-tier plans. This creates a powerful incentive for tenants to upgrade. Custom domains have high perceived value — tenants will happily pay more for the ability to use their own domain.
How Tenants Set Up Custom Domains
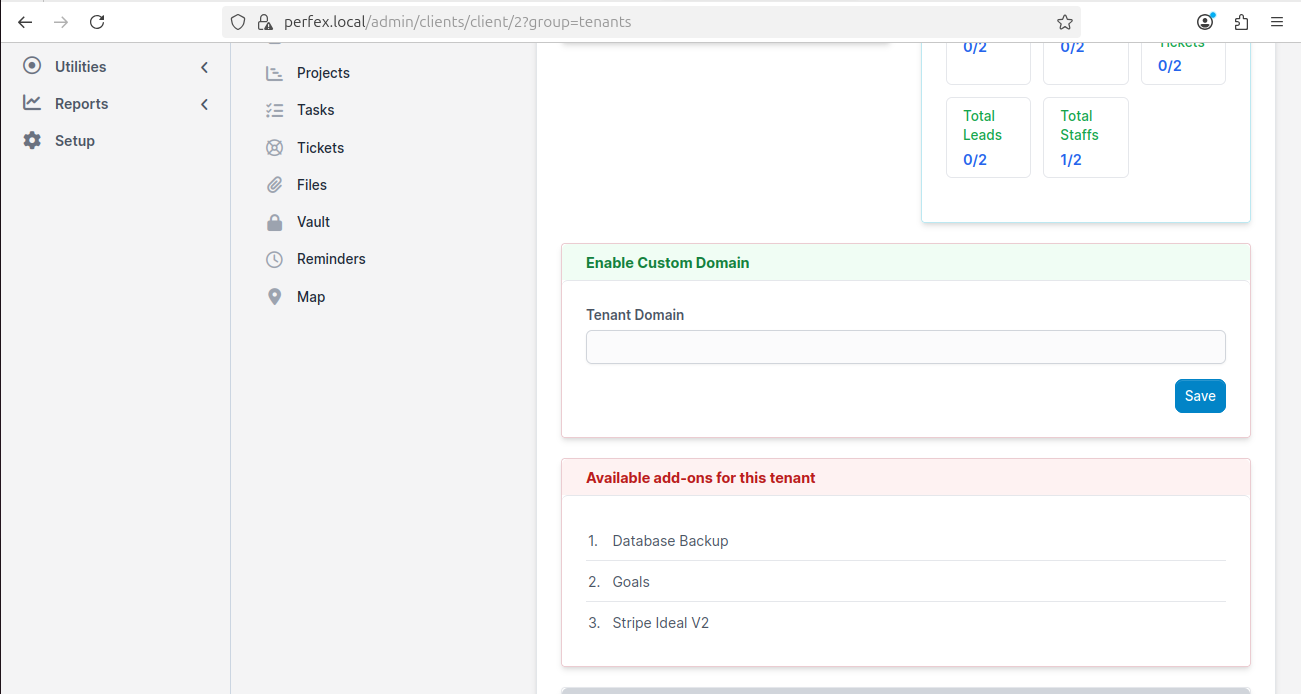
Once custom domains are enabled for their plan, tenants will see a "Enable Custom Domain" section in their dashboard.
Step 1: Tenant Enters Their Domain
Tenants simply type their domain name and click Save
Step 2: Tenant Configures DNS
When a tenant clicks the info icon (ℹ️) next to the Custom Domain section, they see a built-in DNS configuration guide:
A clear, step-by-step DNS guide appears right inside the dashboard — no need to create support documentation!
The guide tells them exactly what to do:
Purchase a domain (if they don't have one)
Access their DNS settings at their registrar
Add an A Record pointing to your server's IP
Optionally add a www version
Wait for DNS propagation (up to 48 hours)
Step 3: Domain Goes Live
Once DNS propagates, the tenant can access their CRM at their custom domain. The module handles all the routing automatically.
Admin View of Custom Domains
As an admin, you can see and manage tenant custom domains:
Go to Customers in your admin panel
Click on the tenant
Look for the "Enable Custom Domain" section
Admin can view and manage custom domains for any tenant
SSL for Custom Domains
Custom domains need their own SSL certificates. Options:
Method
Effort
Cost
Tenant uses Cloudflare
None (tenant handles it)
Free
Let's Encrypt (Certbot)
Run one command per domain
Free
Paid certificate
Manual installation per domain
$10-70/year
The easiest approach is to recommend Cloudflare to your tenants — they get free SSL automatically.
Troubleshooting Custom Domains
Issue
Cause
Fix
Domain shows "not found"
DNS hasn't propagated
Wait up to 48 hours and try again
Domain shows your hosting default page
Web server not configured for the domain
Add the domain to your Apache/Nginx config
SSL warning
No SSL certificate for the custom domain
Set up SSL using Let's Encrypt or Cloudflare
Custom domains configured! Next, set up the API Settings if you need programmatic access to your SaaS platform.